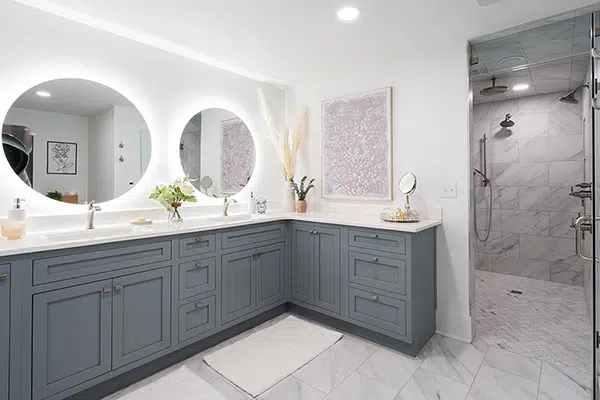
Transforming your home’s interior can begin with just one element: the tile pattern. The 1/3 offset tile pattern is gaining popularity for its unique and eye-catching look. Unlike traditional straight or even half-offset patterns, the 1/3 offset shifts each row of tiles by one-third of their length, creating a dynamic and appealing layout.
This pattern offers a fresh take on tile installation, making floors and walls stand out. It’s a versatile choice that works well with many types of tiles, from sleek porcelain in bathrooms to elegant wood-look tiles in living rooms. Whether you are renovating your kitchen or revamping your bathroom, the 1/3 offset tile pattern brings a touch of modern elegance to your space.
Understanding and implementing this tile pattern can elevate the aesthetics of your home. It not only enhances the visual interest but also addresses practical concerns like reducing lippage, where tile edges do not align perfectly. This guide will explain what the 1/3 offset tile pattern is, its benefits, how to install it, and design inspirations to help you make the most of your remodel.
What is a 1/3 Offset Tile Pattern?
A 1/3 offset tile pattern, also known as a third stagger, involves shifting each row of tiles by one-third of the tile’s length. This creates an overlapping effect that can add visual interest to floors and walls. Unlike traditional grid or 1/2 offset patterns, the 1/3 offset provides a more dynamic look, giving the impression of continuous movement and fluidity.
This pattern can be used with various tile shapes and sizes. Commonly, rectangular tiles are chosen for this layout, but you can also experiment with square or even more unique tile shapes. The goal is to achieve a balanced, visually appealing layout that feels cohesive yet modern.
Using a 1/3 offset pattern reduces the appearance of lippage, which is the unevenness between adjacent tiles. By shifting the alignment, this method helps create a smoother surface. This is particularly beneficial when using larger tiles, which may naturally have slight warping. The 1/3 offset pattern ensures any imperfections are less noticeable, resulting in a more polished finish.

Benefits of Using a 1/3 Offset Tile Pattern in Your Home
Aesthetic Appeal: One of the main benefits of using a 1/3 offset tile pattern is its aesthetic appeal. The staggered design creates a unique visual rhythm that captivates the eye, making any space look stylish and sophisticated. It’s a great way to add personality to rooms like kitchens and bathrooms without overwhelming the space.
Minimized Lippage: As mentioned earlier, the 1/3 offset pattern helps reduce lippage. By staggering the tiles in thirds, the overall surface becomes more uniform. This not only enhances the look but also the feel, making floors and walls smoother to the touch.
Versatility: This pattern works with various tile materials, including porcelain, which is preferred for its durability and ease of maintenance. The flexibility to use different types of tiles means you can customize the look to match your design vision. Whether you’re aiming for a modern, rustic, or traditional style, a 1/3 offset pattern can adapt to your needs.
Enhanced Space Perception: The pattern can also make a room appear larger. The continuous lines created by the staggered layout draw the eye across the space, giving the illusion of more area. This is particularly useful in smaller rooms or areas you want to feel more expansive.
Easy to Clean: With fewer grout lines compared to smaller tile patterns, a 1/3 offset layout is easier to clean and maintain. The broader expanse of tile surface means less time scrubbing grout, making it both a practical and stylish choice for busy homeowners.
By considering these benefits, it’s clear why the 1/3 offset tile pattern is a popular choice for modern home renovations. It offers both functional and aesthetic advantages, making your spaces look better and work more efficiently.
How to Install a 1/3 Offset Tile Pattern: Step-by-Step Guide
Installing a 1/3 offset tile pattern requires careful planning and precise execution. Here’s a step-by-step guide to help you achieve a professional finish:
Final Cleaning: After the grout dries, clean the tile surface to remove any haze. Buff with a soft cloth to ensure a clean finish.
Prepare the Surface: Start by ensuring the surface is clean, level, and free from any debris. A good subfloor or wall backing is crucial for a smooth installation.
Layout Planning: Lay out your tiles without adhesive first. This dry run helps you visualize how the pattern will look and allows you to make any necessary adjustments before the tiles are permanently set.
Measure and Mark: Find the center point of your surface and mark guidelines with a chalk line. This will help keep your tiles straight and aligned as you work.
Mix and Apply Adhesive: Mix your tile adhesive according to the manufacturer’s instructions. Using a trowel, spread the adhesive in a small, manageable area. Work in sections to prevent the adhesive from drying out.
Start Laying Tiles: Begin placing the tiles along the guidelines. Shift each tile row by one-third of its length to achieve the offset. Use tile spacers to maintain consistent gaps for grout lines.
Cutting Tiles: Use a tile cutter or wet saw for precise cuts, especially around edges and corners. Safety gear is essential when handling cutting tools.
Check Alignment: Regularly check that your tiles are straight and evenly spaced. Adjust as needed to maintain the 1/3 offset pattern.
Allow to Set: Let the tiles set in the adhesive for the recommended time before walking on them or applying grout.
Apply Grout: Once the adhesive is set, remove the spacers and mix your grout. Apply it using a grout float and work it into the gaps. Wipe away excess grout with a damp sponge.

Design Inspirations: Creative Applications of the 1/3 Offset Tile Pattern
A 1/3 offset tile pattern works in various settings and can be adapted to fit different styles. Here are some creative applications to inspire your next project:
Modern Kitchens: Use large-format porcelain tiles in a neutral color for kitchen floors. The 1/3 offset pattern adds subtle interest without overwhelming the space. It pairs well with sleek, contemporary cabinetry and fixtures.
Elegant Bathrooms: Choose glossy, rectangular tiles for bathroom walls. This pattern can extend into the shower area, creating a seamless look. Consider light shades to make the space feel larger and more inviting.
Living Room Floor: Wood-look porcelain tiles arranged in a 1/3 offset pattern can create a warm, natural feel in living areas. This design mimics traditional wood flooring but offers the durability and ease of maintenance of porcelain.
Accent Walls: For a bold statement, use the 1/3 offset pattern on an accent wall. This can be particularly striking with textured tiles. It transforms a simple wall into a focal point, adding depth and character.
Outdoor Spaces: Durable porcelain tiles with a 1/3 offset pattern can enhance patios and walkways. The offset pattern makes these areas look polished and inviting, perfect for outdoor entertaining.
By experimenting with different tiles and placements, you can find unique ways to incorporate the 1/3 offset tile pattern into your home. The versatility of this pattern makes it an excellent choice for various design styles and spaces.

A 1/3 offset tile pattern is a fantastic way to enhance your home’s interior. Its unique layout brings both visual appeal and practical benefits. Understanding the installation process and exploring various design applications allows you to transform any room into a stylish and functional space.
At J&J Construction, we excel at helping homeowners bring their visions to life. If you’re considering a home remodel and want to incorporate the 1/3 offset tile pattern, our experienced team is here to guide you. Reach out to J&J Construction today, and let’s create the home of your dreams.


